Schema as a Service provides database consolidation by allowing administrators to host multiple application schemas within a single database. This offers Database as a Service to possibly hundreds of application users without creating database sprawl. Users can perform day-to-day actions like provisioning, monitoring, and backup, all from a single Self Service console. Schema as a Service leverages database features like Resource Manager and Database Vault to isolate users of the cloud. This is complemented by metering and showback / chargeback capabilities, which provide visibility and transparency into resource consumption by each user.
Schema as a Service Setup
Schema as a Service can be used to provide profiles and service templates for both an empty schema service and a schema service with seed data. In each case, the Cloud Infrastructure setup is very similar to the PDBaaS model. Typically, these steps are done only once and consist of:
- Configuring the Software Library
- Defining roles and assigning them to users
- Creating PaaS Zones and Pool
- Configuring request settings for the DBaaS cloud
- Configuring quota for the Self Service roles.
The only difference with Schema as a Service from the setup perspective is how the pool is defined. For Schema as a Service, you will have to define a different pool, which will contain a pool of databases that the schemas will be deployed to.
Before we drill into the details, let’s talk about the environment we’ll be using to set this up. It’s a fairly simple environment consisting of two hosts, host1 and host2. host1 contains the prod database, which is our reference or master database containing the HR schema, which is the schema we will be replicating with Schema as a Service. host2 contains the test database, which we will populate in a separate blog post. The databases need to exist before we setup Schema as a Service. Diagrammatically, it looks like this:

Creating a Directory Object
Schema as a Service uses a directory object to export the data from the reference database – in our case, the HR schema in the PROD database – so we need to create a directory object and grant HR read/write access to it. Obviously, I can do that through SQL*Plus, but I’ll be honest – I can never remember the syntax so it’s quicker for me to do it through Enterprise Manager than to look up the syntax in the docs. 🙂 This is done from the PROD database home page, by following the path Schema → Database Objects → Directory Objects. After logging in, you see the screen below where you can click on the “Create” button:

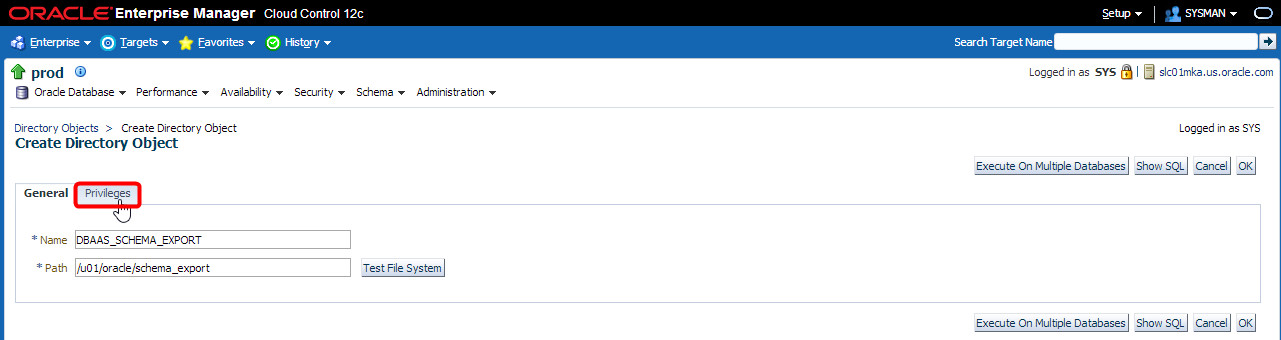
On the “Create Directory Object” page, I need to provide a name for the directory object (in this case, I’m using DBaaS_Schema_Export) and an operating system path to the directory I will be using (e.g. /u01/oracle/schema_export). I can click on the “Test File System” button to validate the path is correct:

On the next screen, I will be shown the host name and Oracle Home location, and can enter credentials to validate the path. In this case, I already have a named credential so I select that and click “Login”:

The system will now login as that user and validate the path exists. Provided I have not made any typos, I should see a message that the directory exists and I can simply click “Return”:

I also need to assign the correct privileges on the directory object to the HR user. To do that, I click the “Privileges” tab:
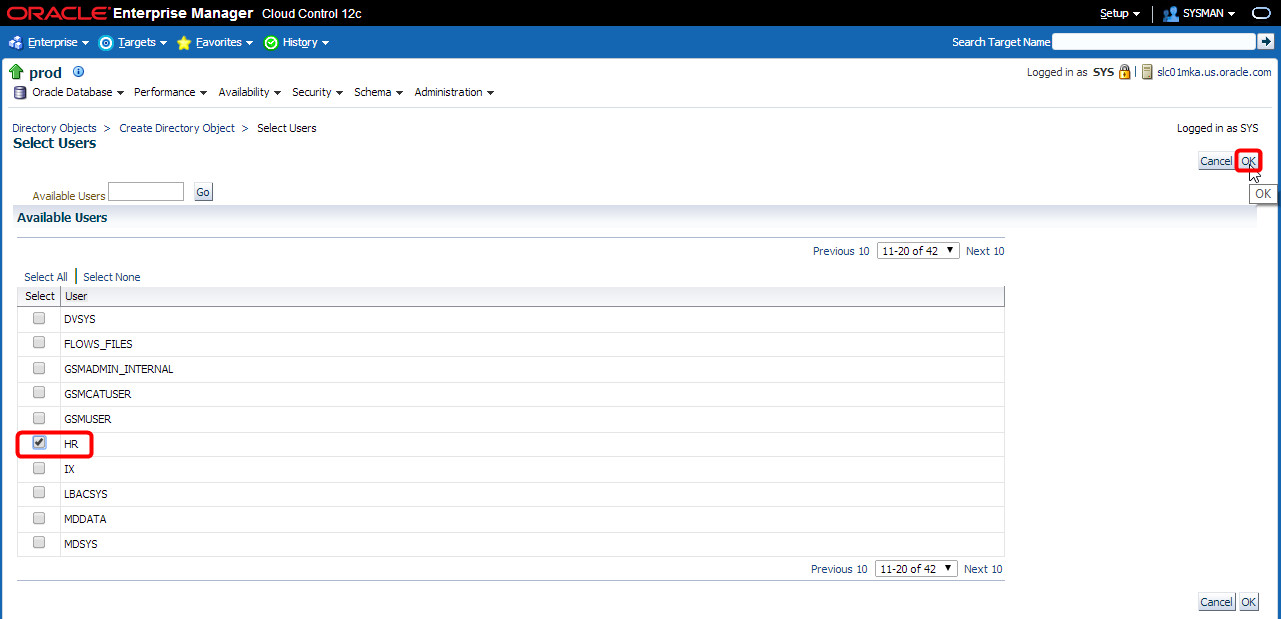
A list of users defined in the PROD database appears. I can scroll through that list till I find the HR user, then select it and click “OK”:
Select both “Read Access” and “Write Access” and click “OK”:

You should now see a message that the directory has been created successfully, and the directory should be listed in the directory objects list as well:

Creating a Database Pool
Now that we’ve created the directory object, we can go through the rest of the process of setting up Schema as a Service. Start by following the path Setup → Cloud → Database:

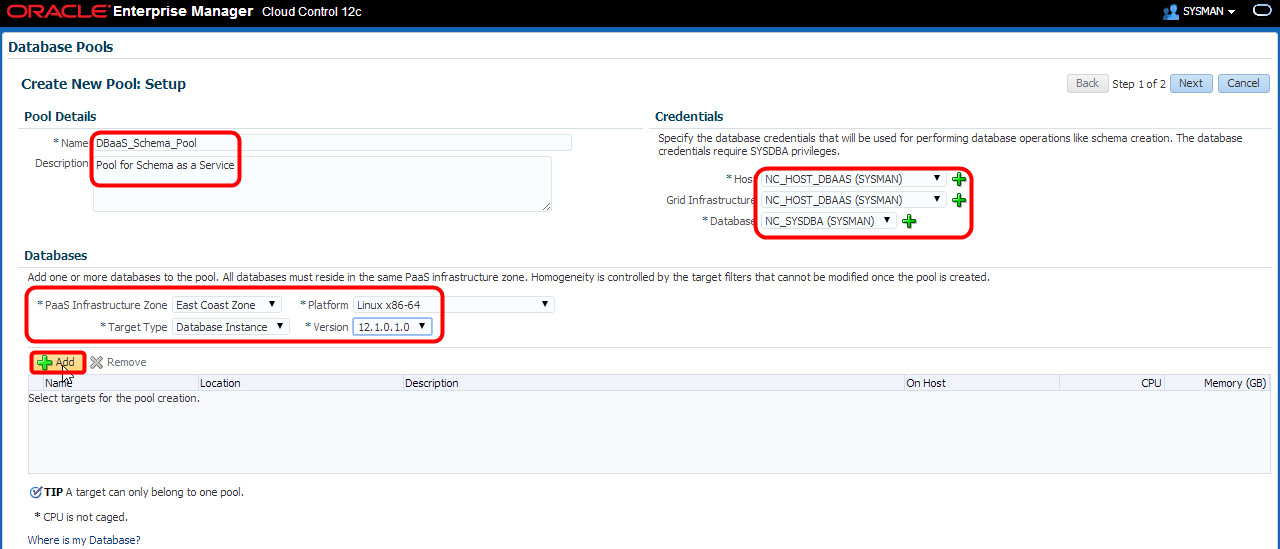
As I mentioned earlier, we need a database pool that has been created specifically for Schema as a Service so we can’t reuse the database pool I created in my earlier post on PDBaaS. This time, I select “For Schema” from the “Create” dropdown list:

Again, I need to provide the pool details, credentials and PaaS Infrastructure Zone details like I did when setting up PDBaaS, then click “Add” to select databases for the pool:
On the “Select and Add Targets” pop-up, I can select multiple databases to add to the pool, and in a real cloud environment I normally would do exactly that. In my small scale lab that I’m using, I simply select the TEST database row and click “Select”:

Back on the Setup page, I have now entered all the values I need so I just click “Next”:

The “Policies” page is where you set up the placement policies for the resources in the pool. You can place constraints on the maximum number of schemas that can be created on a database in the pool (via the maximum number of database services), as well as setup the maximum workload parameters for each service. The placement algorithm uses these parameters to determine which database the schema is placed in (when there is more than one database in the pool, obviously). In the example shown below, I have set the maximum number of database services to 15, and enabled the workload limitations and Resource Manager. All that remains to do is click “Submit”:

You will then see a message that the Database Pool has been created successfully:

Creating a Profile and Service Template
Now that I’ve created the pool, the next step is to create a Profile and a Service Template for Schema as a Service. To start this process, click on “Profiles and Service Templates”:

First I’ll create a profile by clicking “Create” in the “Profiles” region:

The first screen of the wizard needs me to select the magnifying glass to search for a reference target:

In my small environment, I can already see the PROD database listed, but I could search for it if there are lots of targets. Once that row is chosen, I click “Select”:

On the “Create Database Provisioning Profile: Reference Target” page, there are two regions that need attention. Firstly, for the “Reference Target” region, I uncheck the “Database Oracle Home” checkbox, click the “Structure and Data” radio button, and select the “Export Schema Objects” radio button. Secondly, in the “Credentials” region, I provide the relevant named credentials for the host and the database. Then I click “Next”:

On the “Content Options” wizard step, I choose the “HR” schema from the “Available Schemas” list and move it to the “Selected Schemas” list:

The “Dump” region tells us where the export files for the schema being exported will be placed. In my environment, this directory is an NFS mount point I used when I created the directory object earlier. Click “Add” to specify the dump directory:

Next, I choose the row containing the directory object I created earlier, and click “Select”:

Back on the “Directory Locations” region, I also need to specify the log directory. Personally, I would prefer this to default to the same directory added for the dump file – maybe I should add that as an enhancement request! 🙂 I can click on the magnifying glass to do this:

As I haven’t created a separate directory object for the logs to go to, I simply select the same directory object again and click “Select”:

If I was exporting a decent size data set, I can also specify the degree of parallelism for the export job. However, the HR schema isn’t particularly large so I leave the degree of parallelism at the default of 1 and click “Next”:

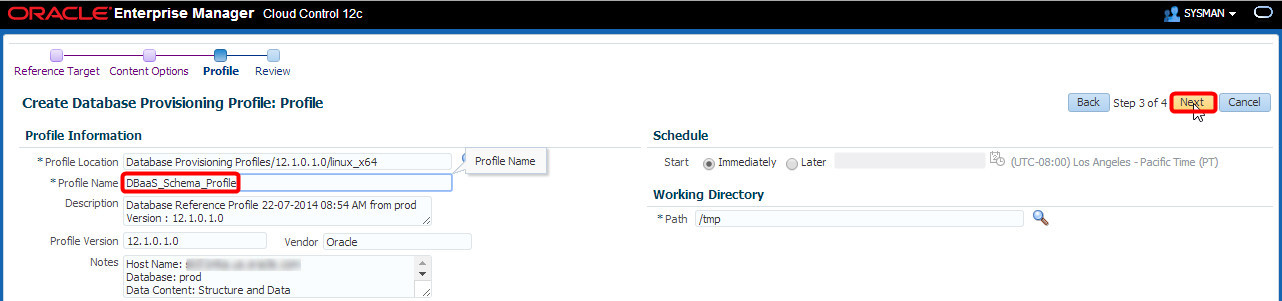
On the next screen, I give the profile a meaningful name and click “Next”:
On the “Review” step, I can double check that everything is as expected, and then click “Submit”:

At this stage, a procedure is created and executed, and I am redirected to the Procedure Activity screen. You can click “View” → “Expand All” to see all the steps that will be executed in the procedure:

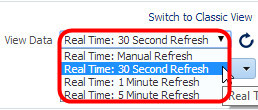
I can also change the View Data refresh rate in the top right corner so I can see the procedure activity status refreshing until it is complete:
Once the procedure completes successfully, you’ll see a screen like this:

So that’s the profile I’m going to use created. Now I need to create a service template, so I need to go back to the Database Cloud Self Service Portal Setup page, by following the path Setup → Cloud → Database:

Again, I click “Profiles and Service Templates”:

This time, I want to select “For Schema” from the “Create” dropdown list in the “Service Templates” region:

I provide a meaningful name and description for the name, then click the magnifying glass to select a profile to import the schema from:

Now I select the DBaaS_Schema_Profile profile I created in the previous section and click “Select”:

Back on the General step of the wizard, I would normally select a “master account” that will have the necessary privileges to manage objects owned by other schemas in the export. In this case, of course, the profile only has one schema in the export, so the master account should be automatically set to “HR”. I make sure that has been selected, and click “Add” in the “Zones” region:

In my example, I’m still using the East Coast Zone, so I select that row and click “Select”:
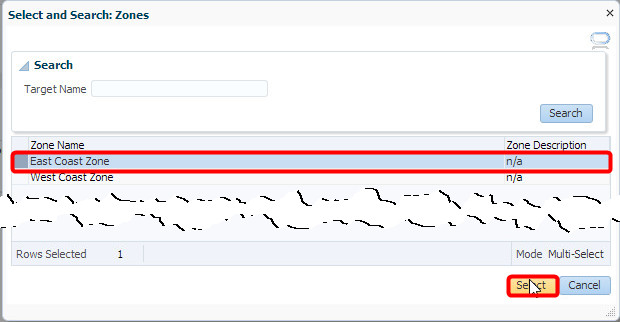
Now I need to select the East Coast Zone again, and this time click the “Assign Pool” button to assign a pool to the zone:

This time I select the DBaaS_Schema_Pool pool, and click “Select”:

Now I need to set the “Shared Location”. The Shared Location is a filesystem where the export files are located, so I click the magnifying glass next to the “Shared Location” field:

I locate the OS directory I used for the directory object created earlier, then click “OK”:

That’s all I need to provide on the “General” wizard step, so I can click “Next”:

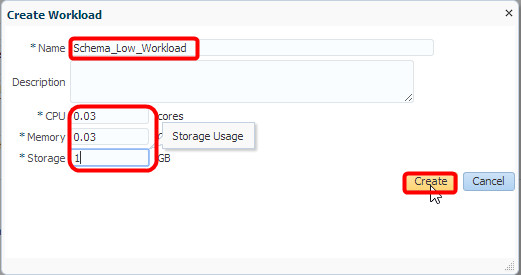
On the “Configurations” step, I want to setup different workload sizes that can be chosen by the Self Service user at run time, based on the CPU, memory and storage requirements of a particular service. To do this I click “Create”:

In this case, the workloads are likely to be fairly small, so I allocate .03 cores, .03 GB of memory and 1 GB of storage at the low end and click “Create”:
Likewise, I can create a couple of other workloads by repeating the same steps. In the “Schema Privileges” region I can provide a name for the database role that will be associated with the master account for the service, and I can define a tablespace that will be created for the service as well. In my example, I’ve left the default role name and set the tablespace to be specified by the workload size selected at request time. I then click “Next”:

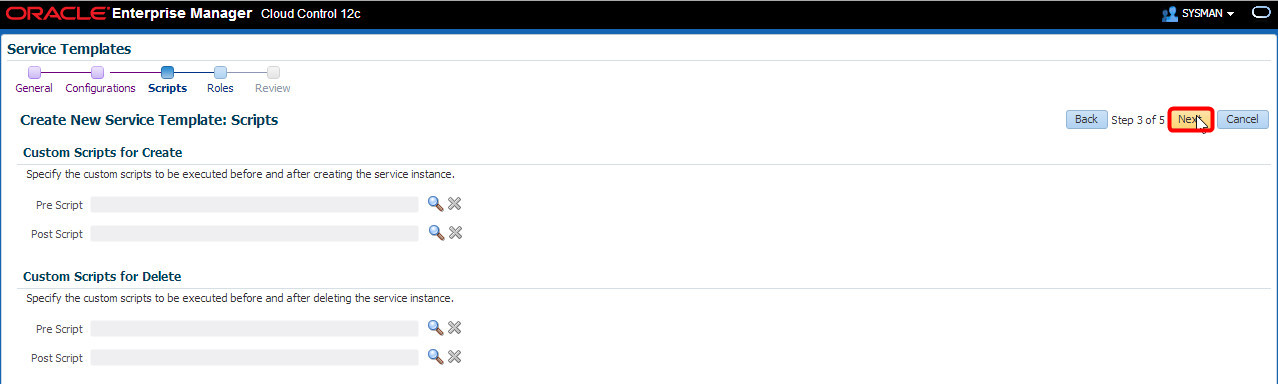
On the next step of the wizard, you can set scripts to be run before and after creation and/or deletion of the service instance. I’m not going to do that so I just click “Next”:
A service template can be configured with one or more roles, so on the next step I click “Add” to add the “DBAAS_CLOUD_USERS” role created earlier:
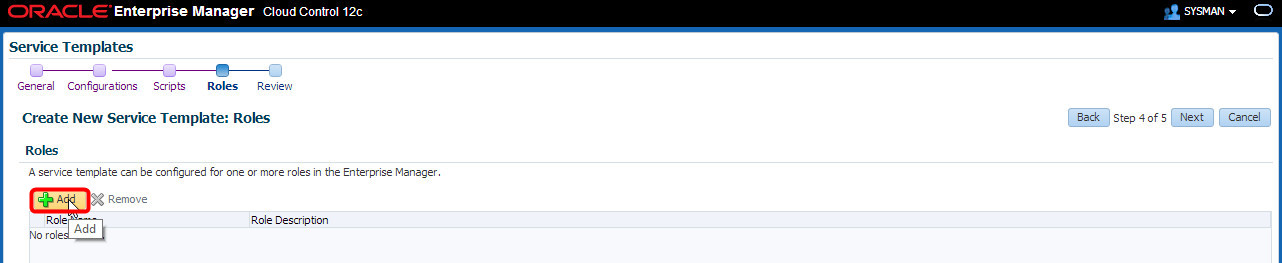
I select the row for that role and click “Select”:

That’s all I need to do on the Roles step, so I just click “Next”:

Finally I can review all the settings for the Service Template, and click “Create” to create the new service template:

I should then see a message that the service template has been created successfully, and see it listed in the “Service Templates” region:

Now we are done. The next step is to start using Schema as a Service, which will be the subject of another blog post!

Leave a comment